
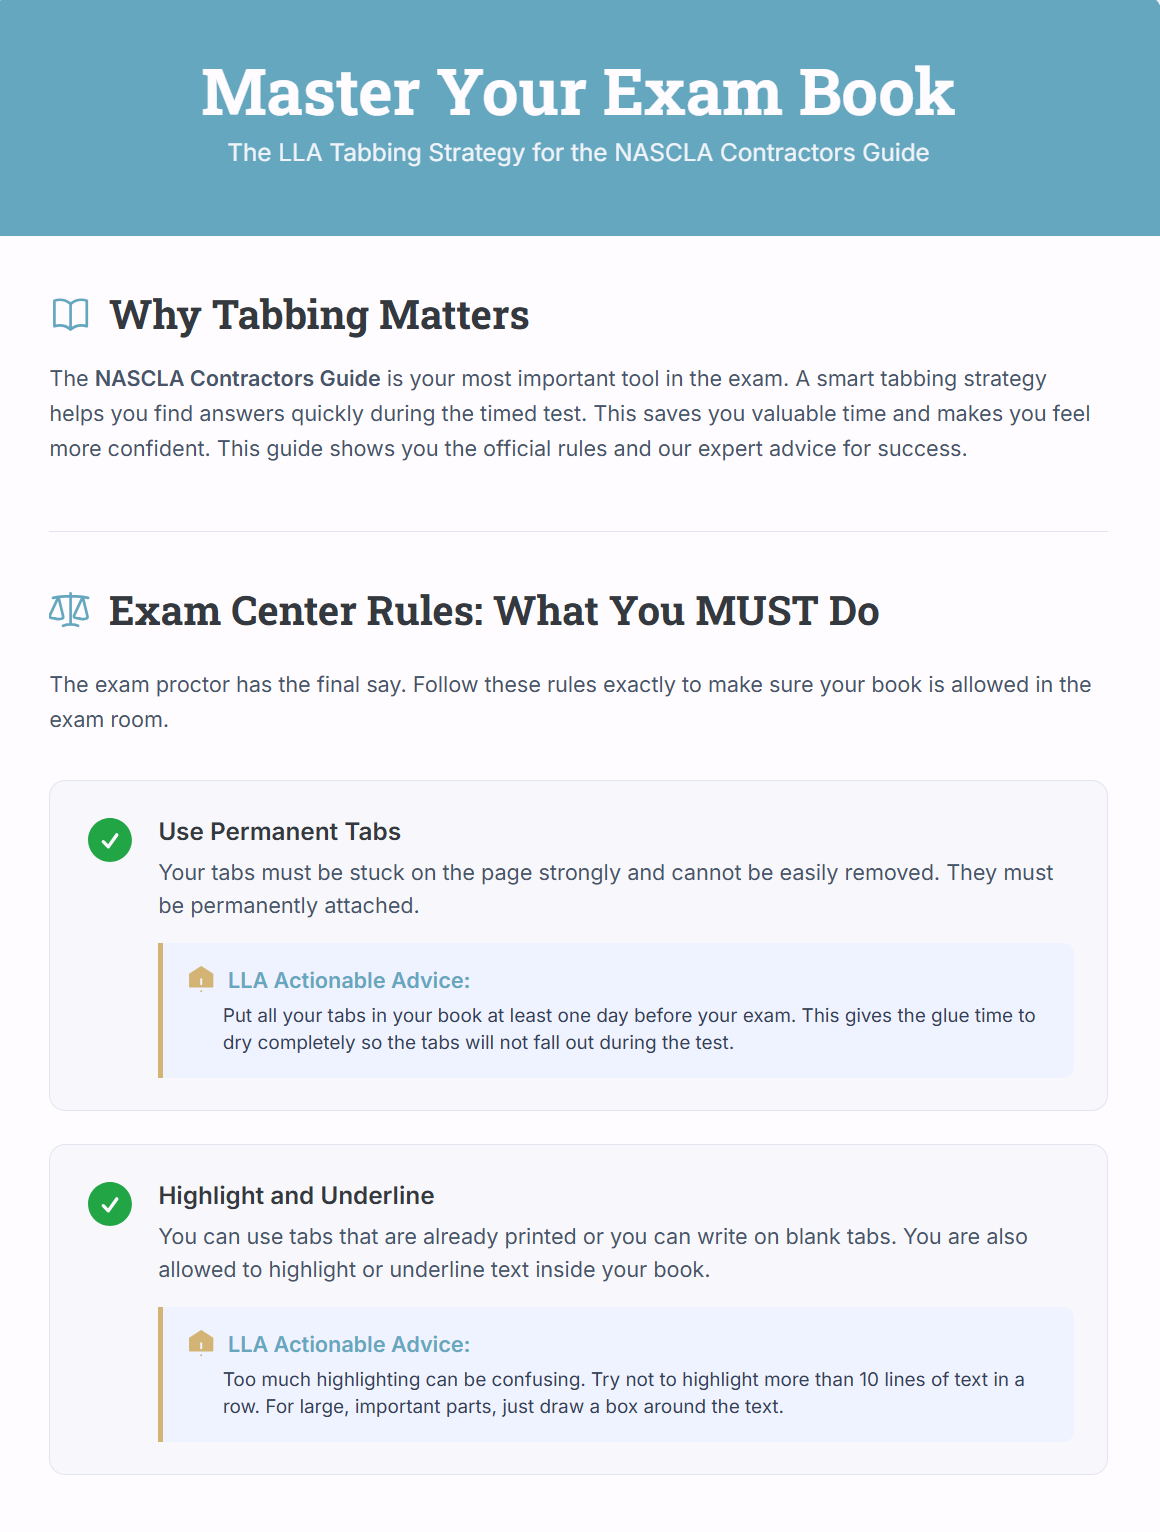
CLICK THE IMAGE TO ADD TO YOUR NASCLA PREP STUDIES!
First, you need to decide which specific tabs you’re going to use and the exact text for each one.
Open the SureTabs Guidance: Look at your LLA SureTabs Guidance document. This is your expert list of the most important sections, chapters, or topics in your physical reference books.
Select Your Text: The guidance document provides suggested text for each tab to ensure the best organization for the exam. You'll simply copy the exact text you want to appear on each tab (e.g., "Liens," "Workers' Compensation," "Safety (OSHA)").
Step 2: Customize the Word Template
Now, you'll transfer that text into the provided template to create your printable file.
Open the Word Template: Open the Word template file (RediTag_Printable_TemplateB39017.docx) you plan to take to the printer.
Enter Your Tab Text: Paste the text you copied from the SureTabs Guidance document into the designated fields in the template.
Adjust the Design (Optional but Recommended):
To change the text size or style after entering your text, highlight the fields you want to modify, right-click, and select Remove Content Control.
Now you can adjust the font size and style as needed to make sure it's clear and easy to read.
Remove Empty Fields: If you don't use all the available tabs, you must remove the empty text fields so they don't print blank. The easiest way is to tab through each empty field and press the space bar.
You're now ready to save the file and take it to a professional printer for a clean, consistent result.
Save the File: Save your customized Word document with a clear name (e.g., FLBF_SureTabs_ReadyToPrint.docx).
Take it to the Store: Go to a local office supply store like Office Depot or Staples and ask them to print the file directly onto your Redi-Tag tab sheets using their professional printing services.
Key Printing Specs to Share: When at the print center, provide them with these essential settings for a perfect print:
Paper Size: The page setup should be landscape orientation.
Dimensions: The width should be 7.25′′ and the height should be 8.5′′.
Feed Direction: Always feed the template on the long (8.5′′) side.
Affix the Tabs: Once printed, you can immediately peel and apply the pre-printed tabs to the correct pages in your official reference manuals according to your SureTabs Guidance.